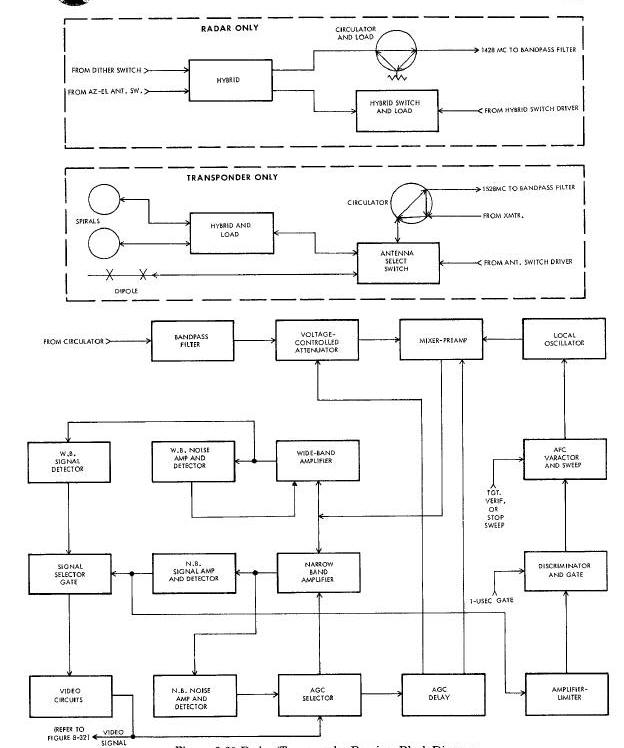
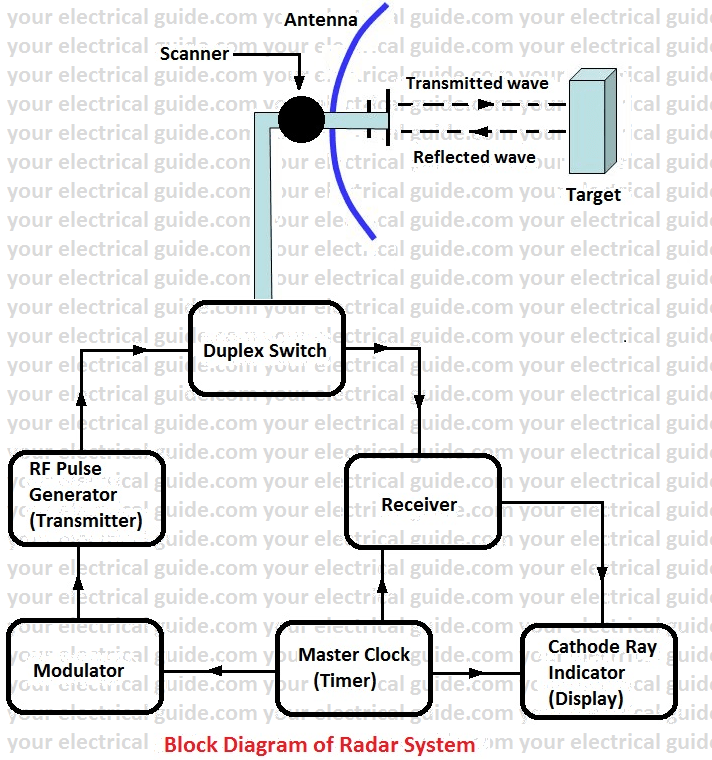
radar block diagram and operation with explanation
radar block diagram and operation with explanation Gallery
Explore high-quality radar block diagram and operation with explanation images in this curated gallery. Perfect for inspiration, wallpapers, and creative use.
This page showcases a variety of visuals related to radar block diagram and operation with explanation in a clean, modern layout designed for fast and enjoyable browsing.